Ironing boards are essential household tools that provide a smooth surface for ironing clothes. While setting up an ironing board is a relatively straightforward task, collapsing it can sometimes be a bit tricky. In this article, we will guide you through the process of How To Collapse An Ironing Board, provide tips for easy and efficient collapse, and discuss special considerations for different types of boards.
Understanding the Anatomy of an Ironing Board
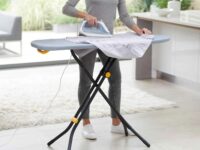
Before diving into the specifics of collapsing an ironing board, it’s important to familiarize yourself with its basic anatomy. An ironing board consists of a flat surface, usually covered with a heat-resistant fabric and a supporting frame. The frame can vary depending on the type of ironing board, ranging from stand-alone traditional boards to wall-mounted or tabletop models.
Safety Precautions Before Collapsing an Ironing Board
Ensuring safety is paramount when collapsing an ironing board. Before you begin the process, make sure the iron is turned off and unplugged. Additionally, clear the surrounding area to avoid tripping hazards. If your ironing board has any additional features, such as a built-in iron rest or storage racks, make sure they are empty before collapsing.

Step-by-Step Guide to Collapsing an Ironing Board
- Collapsing a Traditional Stand-alone Ironing Board:
- Start by removing any items from the board’s surface.
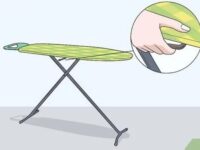
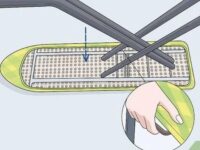
- Release the locking mechanism or lever near the frame’s legs to unlock them.
- Gradually fold the legs inward, ensuring they are securely locked in the collapsed position.
- Collapsing a Tabletop Ironing Board:
- Clear the surface of the board.
- Look for any locking mechanisms or levers near the hinge that connects the board to its supporting legs.
- Release the locking mechanism and gently fold the legs inward, ensuring they are securely locked in the collapsed position.
Tips for Easy and Efficient Ironing Board Collapse
To streamline the collapsing process and prevent any potential difficulties, consider the following tips:
- Familiarize yourself with your specific ironing board’s design and features by referring to the manufacturer’s instructions.
- Ensure a clear and unobstructed path before collapsing the board to avoid accidents.
- Take your time when folding the legs or hinges, paying attention to any locking mechanisms to prevent unexpected unfolding.
- If you encounter resistance, check for any obstructions or loose parts that may be hindering the collapse.

Storing an Ironing Board: Best Practices and Space-saving Ideas
After collapsing your ironing board, storing it properly is crucial to maintain its condition and maximize space efficiency. Here are some best practices and space-saving ideas for ironing board storage:
- Store the collapsed board in a dry and well-ventilated area to prevent moisture damage.
- Consider using a dedicated ironing board storage bag or cover to protect it from dust and potential scratches.
- Utilize wall-mounted hooks, brackets, or hangers to hang the board vertically, saving floor or closet space.
- If you have limited storage options, explore collapsible or compact ironing board models that occupy less space when stored.
Maintaining and Cleaning an Ironing Board for Longevity
Regular maintenance and cleaning can extend the lifespan of your ironing board. Here are some tips to keep it in optimal condition:
- Inspect the board’s fabric cover periodically and replace it if it becomes worn or damaged.
- Clean the ironing board surface with a damp cloth to remove any stains or residue.
- Avoid using harsh chemicals or abrasive materials that may damage the board’s surface or frame.
- Ensure the legs or hinges are clean and free from any debris that could affect their functionality.
Portable Ironing Boards: How to Collapse for Travel
For those who frequently travel or need a portable ironing solution, collapsible ironing boards are a convenient option. Here’s how to collapse a portable ironing board for travel:

- Remove any items from the board’s surface and ensure the iron is turned off and unplugged.
- Look for any locking mechanisms or levers near the board’s legs or hinges.
- Release the locking mechanism and fold the legs or hinges inward, following the manufacturer’s instructions.
- Some portable ironing boards have additional features like foldable handles or compact storage bags. If applicable, fold the handle or pack the board into its storage bag according to the provided instructions.
- Securely fasten any straps or Velcro closures that may be included to keep the board compact during transport.
- Place the collapsed ironing board in a protective carrying case or bag to prevent damage during travel.
Collapsing an Ironing Board with Built-in Iron Rest
Certain ironing boards come equipped with a built-in iron rest, providing a convenient and safe spot to place the iron while in use. When collapsing an ironing board with a built-in iron rest, follow these steps:
- Ensure the iron is turned off and unplugged, and remove it from the iron rest.
- Clear the board’s surface and any storage compartments attached to the iron rest.
- Look for any locking mechanisms or levers near the board’s legs or hinges.
- Release the locking mechanism and fold the legs or hinges inward, ensuring they are securely locked in the collapsed position.
- If the iron rest has a separate folding mechanism, follow the manufacturer’s instructions to fold and secure it.
Special Considerations for Collapsing Wall-mounted Ironing Boards
Wall-mounted ironing boards are a space-saving solution for smaller areas. When collapsing a wall-mounted ironing board, take note of these considerations:

- Clear the board’s surface and remove any items from storage compartments, if present.
- Look for any release buttons or levers near the board’s mounting bracket or hinges.
- Press the release button or pull the lever to unlock the board from its mounting bracket.
- Gently fold the board downward, ensuring it is securely locked in the collapsed position.
- Some wall-mounted ironing boards have a feature that allows you to adjust the height or swivel the board. If applicable, adjust the board to its lowest height and fold it according to the manufacturer’s instructions.
Collapsing Ironing Boards with Height-adjustment Features
Some ironing boards offer height-adjustment features to accommodate different users or ironing preferences. When collapsing an ironing board with height-adjustment capabilities, follow these steps:
- Clear the board’s surface and remove any items from storage compartments.
- Look for any locking mechanisms or levers near the board’s legs or height-adjustment mechanism.
- Release the locking mechanism and lower the board to its lowest height setting.
- Fold the legs or hinges inward, ensuring they are securely locked in the collapsed position.
- If the height-adjustment mechanism has a separate folding mechanism, follow the manufacturer’s instructions to fold and secure it.
Troubleshooting Common Issues when Collapsing an Ironing Board
Sometimes, you may encounter difficulties when collapsing an ironing board. Here are some troubleshooting tips for common issues:
- Stuck or Jammed Mechanism: Check for any obstructions or debris in the locking mechanism or hinges. Remove any foreign objects and try collapsing the board again.
- Resistance or Difficulties: Lubricate the hinges or locking mechanisms with a silicone-based spray or lubricant to ease movement. Avoid using oils or greases that may stain or damage the board’s fabric.

- Unstable or Wobbly Legs: Ensure that the legs are fully extended and locked in place before collapsing the board. If the legs remain unstable or wobbly, inspect them for any loose screws or parts. Tighten or replace any necessary components to ensure stability.
- Uneven Folding: If the board doesn’t fold evenly or one side collapses before the other, double-check that the locking mechanisms or levers are fully released. Adjust and align the board properly before attempting to collapse it again.
Alternative Uses for a Collapsed Ironing Board
When not in use for ironing, a collapsed ironing board can serve various alternative purposes. Here are a few creative ideas:
- Temporary Workspace: Use the flat surface of the collapsed ironing board as a makeshift desk or workspace for activities like crafting or writing.
- Display Stand: Lean the collapsed ironing board against a wall and use it as a unique display stand for artwork, photographs, or decorative items.
- Portable Table: Take advantage of the sturdy frame of the collapsed ironing board by using it as a portable table for outdoor picnics, camping, or extra surface space during gatherings.
- Garment Rack: Hang clothes on the folded ironing board by utilizing the legs or any hooks or racks attached to it, turning it into a temporary garment rack.
How to Collapse an Ironing Board with Extra Features (Storage racks, cord holders, etc.)
Ironing boards with additional features like storage racks or cord holders require extra attention when collapsing. Follow these steps:
- Clear the storage compartments or racks, removing any items.
- Ensure the cords or cables are detached and properly wound or secured, using any cord holders or clips provided.
- Release any locking mechanisms or levers near the legs, hinges, or storage compartments.
- Fold the legs or hinges inward, ensuring they are securely locked in the collapsed position.
- If applicable, fold or secure the storage racks or compartments according to the manufacturer’s instructions.

DIY Ironing Board Collapsing Mechanism Repairs
If you encounter issues with the collapsing mechanism of your ironing board, you may attempt DIY repairs before considering professional help. Here are some common DIY repair options:
- Lubrication: Apply a silicone-based spray or lubricant to the hinges or locking mechanisms to improve their movement. Avoid using oils or greases that may cause stains or damage.
- Tightening or Replacement: Inspect the folding mechanisms, screws, and other components for any signs of looseness or damage. Tighten or replace any necessary parts using appropriate tools.
- Adjustment: If the board doesn’t fold evenly or the legs are misaligned, adjust the hinges or locking mechanisms as needed. Follow the manufacturer’s instructions or consult online resources for guidance.
Choosing the Right Ironing Board for Easy Collapse
When purchasing a new ironing board, consider the following factors to ensure easy and efficient collapse:
- Design and Construction: Look for boards with a simple and sturdy design that facilitate easy collapsing. Avoid overly complex mechanisms that may be prone to malfunction.
- Locking Mechanism: Check that the board has secure and reliable locking mechanisms to keep it in the collapsed position.
- Portability and Storage: If you require a portable or space-saving option, choose boards specifically designed for easy transportation or storage, such as compact or wall-mounted models.
Collapsing an Ironing Board with a Safety Lock Mechanism
Some ironing boards feature safety lock mechanisms to prevent accidental collapse during use. When collapsing an ironing board with a safety lock mechanism, follow these steps:
- Ensure the iron is turned off and unplugged, and remove it from the board if necessary.
- Clear the board’s surface and any storage compartments.
- Look for the safety lock release button or lever near the board’s legs or hinges. It is usually marked or indicated with a symbol.
- Press the safety lock release button or pull the lever to disengage the safety lock mechanism.
- Once the safety lock is released, follow the standard collapsing procedure for your specific type of ironing board as outlined earlier in this article.
- Ensure that the legs or hinges are securely locked in the collapsed position before moving or storing the ironing board.
Remember to familiarize yourself with the specific instructions provided by the manufacturer for the safety lock mechanism on your ironing board model.
Conclusion: Mastering the Art of Collapsing Your Ironing Board
Collapsing an ironing board may seem like a simple task, but it’s important to follow proper procedures and take necessary precautions to ensure safety and longevity. By understanding the anatomy of your ironing board, following step-by-step guidelines, and considering specific features and maintenance requirements, you can easily and efficiently collapse your ironing board.
Whether you have a traditional stand-alone board, a tabletop model, a wall-mounted option, or a portable ironing board, the principles of collapsing remain similar. Take your time, be mindful of safety measures, and consult the manufacturer’s instructions when needed.
By mastering the art of collapsing your ironing board, you’ll not only save space and maintain your ironing board’s functionality but also make your ironing experience more convenient and enjoyable.


