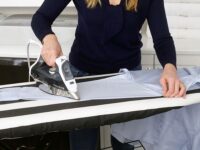
Ironing dress shirts and pants may not be everyone’s favorite chore, but it’s an essential skill that can make a significant difference in your overall appearance. Wrinkled clothing can make you look disheveled and unprofessional, while well-ironed garments convey a polished and put-together image. In this comprehensive guide, we will walk you through the steps of How to Iron Dress Shirts and Pants…
Gather Your Supplies
Before you begin, gather all the necessary supplies. You’ll need:
1. An Iron
Invest in a good-quality steam iron. A steam iron is preferred because it helps to remove wrinkles more effectively.
2. Ironing Board
A stable ironing board with a smooth, padded surface is essential for achieving smooth, wrinkle-free results.
3. Clean Water
Make sure your iron has clean water in its reservoir to produce steam.
4. Dress Shirt and Pants
Choose the garments you want to iron. Make sure they are clean and dry.
5. Spray Bottle (Optional)
A spray bottle filled with water can be useful for stubborn wrinkles.
Prepare Your Iron
- Set the Temperature: Check the care label on your dress shirt and pants to determine the appropriate ironing temperature. Different fabrics require different settings, so make sure your iron is set correctly to avoid damaging your clothing.
- Fill the Water Reservoir: If your iron has a steam function, fill the water reservoir with clean water according to the manufacturer’s instructions.
- Plug In and Preheat: Plug in your iron and set it to the correct temperature. Allow it to fully preheat before you start ironing to ensure even heat distribution.
Prepare Your Dress Shirt
- Button Up: Before ironing, make sure all the buttons on your dress shirt are fastened, including the collar and cuffs. This will help maintain the proper shape of the shirt.
- Inspect for Stains: Check for any stains or spots on the shirt. If you find any, treat them before ironing to avoid setting the stains permanently.
- Turn Inside Out: It’s a good practice to turn the shirt inside out before ironing. This protects the outer fabric and prevents it from getting shiny or damaged.

Ironing Your Dress Shirt
Collar and Cuffs
- Collar: Start with the collar. Lay it flat on the ironing board and gently iron from one end to the other, using short, even strokes. Be careful not to stretch or distort the collar.
- Cuffs: Next, iron the cuffs. Unbutton them if necessary and lay them flat on the ironing board. Use the tip of the iron to get into the corners and edges.
Sleeves
- Sleeves: Lay one sleeve flat on the ironing board with the seam facing up. Smooth out any wrinkles, and then start ironing from the shoulder down to the cuff. Repeat this process for the other sleeve.
Front and Back
- Front: Lay the front of the shirt flat on the ironing board, starting with one side. Iron from the top of the shirt down to the hem, using long, continuous strokes. Move the iron smoothly and avoid stopping in one spot to prevent scorching.
- Back: Repeat the same process for the back of the shirt, ensuring that you maintain a smooth and even ironing motion.
Yoke
- Yoke: The yoke is the upper back portion of the shirt. Lay it flat on the ironing board and iron it carefully, ensuring that it lies flat and smooth.
Ironing Your Dress Pants

Waistband and Fly
- Waistband: Start with the waistband of the pants. Lay it flat on the ironing board and iron it, ensuring it lies flat and smooth.
- Fly: Move on to the fly area (the front closure of the pants). Be cautious around zippers and buttons to avoid damaging the iron or the fabric.
Pockets
- Pockets: Iron the pockets carefully. You can reach inside to smooth out wrinkles, but be sure not to iron over any items left in the pockets.
Legs
- Legs: Lay one leg flat on the ironing board, ensuring that the seam runs along the edge. Iron from the top of the leg down to the hem, using long, continuous strokes. Repeat this process for the other leg.
- Creases (Optional): If your dress pants have creases, make sure they are lined up properly, and then press them in with the iron. Be careful not to create new creases unintentionally.
Final Touches
- Hang Immediately: Once you have finished ironing both the dress shirt and pants, hang them on a hanger immediately to prevent new wrinkles from forming.
- Inspect for Wrinkles: Inspect your garments to ensure you haven’t missed any wrinkles or areas that need attention.
- Store Properly: Store your dress shirts and pants in a cool, dry place to keep them wrinkle-free until you’re ready to wear them.
Conclusion (How to Iron Dress Shirts and Pants)
Ironing dress shirts and pants may take a little time and effort, but the results are well worth it. Wrinkle-free clothing not only looks better but also boosts your confidence and professionalism. With the right tools, techniques, and a bit of practice, you can easily master the art of ironing and maintain a crisp and polished appearance every day. So, the next time you’re faced with a wrinkled dress shirt or pair of pants, don’t hesitate to put these ironing skills to good use and step out looking your best.


